

Integration Requirements:
- An active account with UPS.
- Your UPS account billing address, phone number, and email address..
Follow the steps below to connect you UPS Canada to ShipVista.
Ensure that you are logged into the app and can see the main dashboard.
Click the setting icon at the top right hand corner of the window to go to the settings pages.

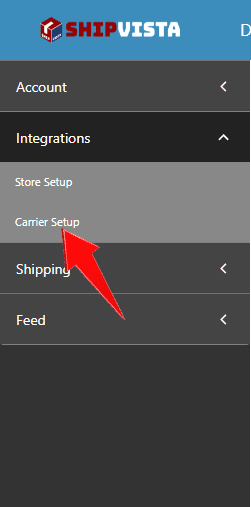
Click the 'Integrations' button on the left hand side accordian to expand the integrations panel.

Select the 'Carrier Setup' option in the panel that opens.
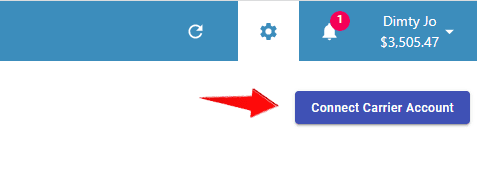
Click the 'Connect Carrier Account' button near the top right hand corner of the screen.
In the dialog that opens, select the UPS logo and a form should open.

In the form, enter the correct information and proceed by clicking the 'Connect Account' button at the bottom of the form.

ShipVista's integration with UPS Canada supports the following standard features:
Common Integration Features
| Feature | Supported? |
|---|---|
| Domestic Shipping | Yes |
| International Shipping | Yes |
| Electronic Customs Submission | Yes |
| Return Labels | Yes |
| Estimated Rates | Yes |
| Carrier Insurance | Yes |
| Tracking | Yes |
| Automatic Tracking | Yes |
| End of Day (Electronic) | Yes |
| End of Day (PDF) | Yes |
| Label Branding | Yes |
| Label Messages | Yes |
| Multi-package Shipping | Yes |
| Multiple Accounts | Yes |
It is advisable to import orders through ShipVista only.
Please contact our customer care team if any issues arise. Visit the support page for contact details.